Why Structural Problems Need Structural Solutions
Rats or mice in your personal space? You're dealing with a structural problem that requires a structural solution. Most property owners have tried everything from over-the-counter poison to sonic emitters, mint oil, radios, lights, wolf pee, and ammonia-soaked rags — it's all ineffective because it doesn't address the root cause.
If you have rats in your structure, you have gaping holes allowing free access. Even if you eliminate every rat currently inside, more will come. Once access is established, rats create scent and pheromone trails that transient rats easily pick up and follow. For this reason, structural rat problems are literally never-ending until you effectively pest-proof the access points, cutting off the 'flow' and isolating existing populations.
Pest control companies often ignore these access points and sell recurring poison services — essentially profiting from an endless problem at the customer and environment's expense. The key to rodent control is checking every square inch. Don't stop once you find one active access point; rats often have multiple routes and will probe for weak spots to create new ones. If you miss one hole, you might as well have done nothing at all.
Roof Access Points: The Most Common Entry Routes
This is the most common area for rat access points, especially for roof rats. Roofers care about one thing: water. We get calls to brand new, multi-million dollar structures that have rats move in right after the new owners do. Structures old and new are built with inherent flaws that allow easy access.
If you hear scratching or squeaking from the roof or attic, head up there and check every square inch. If your roof is high, steep, or you're uncomfortable with heights, hire a professional specializing in pest-proofing and one-way door systems.
Gutter Lines
Gutter lines present multiple vulnerabilities: the fascia board degrades quickly from moisture exposure, built-in gaps between fascia and roof decking, and small gaps at inner and outer corners. Rats identify these flaws and exploit them rather than chewing through solid boards.
Check your gutter line by placing a ladder every few feet, paying special attention to corners. Lift shingles to see how roof decking meets the fascia. Active access points show obvious chewing, droppings in nearby gutters, and black grease marks from rats' fur.
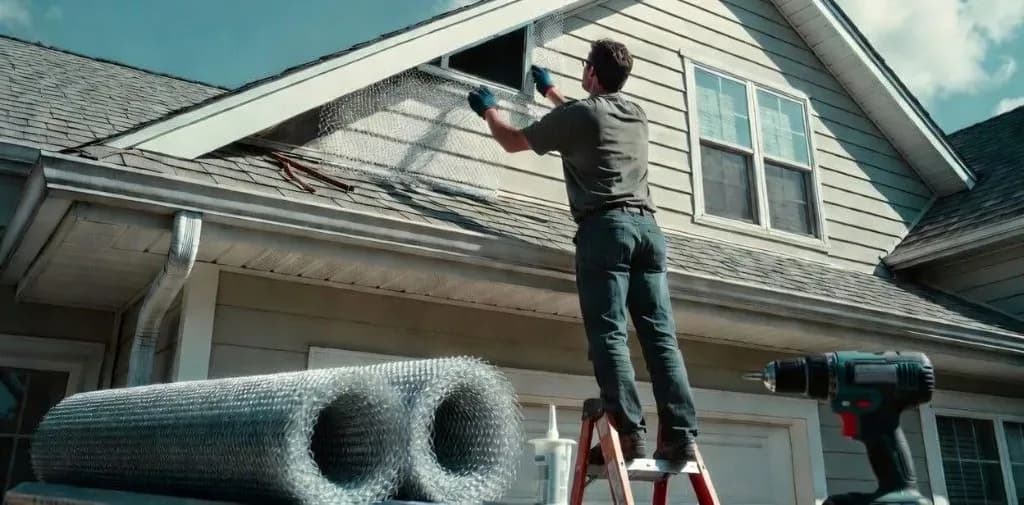
To exclude gutter lines, cut long strips of steel mesh (3-4" wide x 4' long) and screw them into the gutter line covering all gaps. Address any gap completely — partial exclusion is worthless.
Soffit Angles
Soffit angles are extremely common access points where the soffit line of one roof section meets another's shingles. The soffit may look tight but has little structural support. Everything from rats to raccoons test soffit angles house-to-house. Raccoons use their heads to knock soffits out of place — we rarely see houses with roof access in the Lower Mainland without dents in their angles.
To pest-proof soffit angles, cut steel mesh the same width as the soffit line and about 4' long. Tack it onto the line, run tight into the angle, then screw it down onto shingles. Use roof sealant to cover screws, though you'll usually be under the soffit line above. Ensure no gaps larger than 1/2" remain — this doesn't need to look pretty, but it must be secure.
Chimneys and Plastic Vents
Chimneys without grating offer easy access. Cut mesh slightly larger than the opening and press it inside — the mesh will bite and hold effectively. Alternatively, use roof sealant around the chimney opening with screen over the hole.
Plastic roof vents are particularly problematic. Though they look sturdy outside, anything squeezing underneath the overhang only faces plastic bug mesh that rats chew through easily. Remove vents completely to expose and inspect the hole, or exclude from outside by screwing mesh strips into the vent to block the 1" bottom opening.
Tree Access
Simple but critical: cut back any branches touching your roof. Use the 4-foot rule — maintain at least four feet of clearance between vegetation and your structure.
Ground-Level Vulnerabilities: Foundation to Deck
If you're seeing or hearing activity at ground level or in your basement, assume ground-level access points exist. Again, inspect every square inch after moving everything away from walls and foundations.
Foundation Issues
Foundation access points typically occur where the foundation meets the wood structure. Holes may be obvious or hidden underneath siding. If you can fit your whole hand under siding, determine whether it's hiding weak infrastructure by feeling around with a gloved hand. If you can't find solid wood at the top of the void, exclude it.
Cut 3" mesh strips, bend them lengthwise down the middle, push into the void, and let them expand. This simple technique effectively seals foundation gaps.
Doors and Steps
Inspect all doors and frames for noticeable gaps. Cover gaps with mesh, flashing, or install rodent-proof door sweeps. Steps present unique challenges as builders often allow flaws like short-cut boards and unfinished surfaces behind permanent steps, knowing they won't be visible.
Look for trails, digging, droppings, and cached food around step perimeters. If rats are denning under steps with corresponding interior activity, assume an access point exists behind the step.
For inaccessible concrete steps, dig 1x1' trenches around the perimeter and install mesh in an "L" shape — from the step above ground line down into the trench and out. Use concrete drills and screws with washers for permanent attachment.
Deck Areas
Decks commonly hide access points. If the deck is high enough, crawl underneath for inspection. For low decks, pull up boards near the house. If boards run perpendicular to the wall or you want to avoid deck damage, resort to "L" trenching as described for steps.
Hell Pits: When Above-Ground Efforts Fail
A "hell pit" refers to major structural voids or subsurface areas harboring significant rodent populations — large crawlspaces, extensive foundation gaps, or underground tunnel systems that standard surface exclusion cannot address. These situations become apparent when you've completed thorough above-ground pest-proofing work but continue hearing activity or finding fresh signs.
Hell pits typically involve:
- Extensive crawlspace networks with multiple entry points
- Foundation voids extending deep underground
- Compromised basement or sub-basement areas
- Major structural damage creating inaccessible harboring areas
If surface-level exclusion doesn't resolve your rodent problem after 1-2 weeks, you likely have a subsurface issue requiring professional assessment. These situations often need excavation or structural access that risks property damage if handled incorrectly. For detailed information on identifying and addressing hell pit scenarios, see our comprehensive hell pit service guide or read our in-depth analysis of hell pits and foundation flaws.
Don't attempt hell pit remediation without professional consultation — the structural complexity and potential for property damage require specialized expertise and equipment.
One-Way Door Installation: The Game-Changer
One-way doors are the most effective tool for removing rats from your home. Rats dehydrate in as little as 12 hours, so they must venture out nightly for food and water. By pest-proofing minor and potential access points while installing one-way doors at main entry points, you create a one-way system — rats can leave but cannot return.
This approach delivers immediate results regardless of population size. Whether you have 5 rats or 20, they ALL must exit through the door.
Install mesh around access points leaving a 2x2" hole for the door. Mount the door securely, ensuring proper orientation — rats should push under the door to leave. The door's spring mechanism allows outward movement but prevents return entry.
When you find main access points — and you'll recognize them by heavy traffic signs — don't seal them immediately. These become your one-way door locations, forcing evacuation while preventing re-entry.
Strategic Trapping: Interior and Exterior Placement
While one-way doors and pest-proofing handle the primary work, strategic trapping provides additional security and population control. Set traps in active interior locations and secure exterior stations.
Rats initially resist using one-way doors, backing off to explore other options first. They might push deeper into living spaces or attempt chewing pipes or wires. Interior traps catch these desperate animals, while exterior stations capture any probing the structure for re-entry.
Previously unsuccessful with snap traps? That's because rats had no pressure to engage. By cutting off access to resources, you've created desperation — you hardly need bait in this situation.
Effective Baits
Use these household baits for maximum effectiveness:
- Peanut butter
- Nutella
- Raisins
- Nuts (stuck to something sticky)
- Bacon or grease
- Marshmallows
Remember: less is more. Place small amounts on triggers, making rats commit to the pan for the treat.
Program Timeline and Completion
When executed properly, every rat will either get trapped or evacuate through doors within 24 hours — you've left them no choice. Run the program for 1-2 weeks to catch stragglers, but expect main results in the first night or two.
Continue until activity remains quiet for at least one week. Most pest-proofing jobs finish in 1-3 hours, with follow-up work taking minutes.
Once rats are gone permanently, remove doors and interior traps, then seal the holes. Many property owners continue running exterior stations as ongoing monitoring, but if you see no activity, you can store them until needed again.
Why Poison Fails
Regardless of problem severity, poison is never the answer. Beyond inhumane and environmental concerns, poison's best result is stinking carcasses in inaccessible voids requiring serious structural work to remove.
Rodenticide facts:
- You can never determine how many rats consumed bait, whether they died, or where they went
- Rats need 2-8 poison exposures over several days for lethal doses — traps require ONE commitment
- Surviving rats develop resistance and compromised immune systems, increasing disease transmission risk
- Rats don't die peacefully or seek water outside — they typically die in walls creating health hazards
- Rodenticides cause countless secondary poisonings affecting scavengers, birds of prey, and larger predators
- 10,000 children annually in the US are hospitalized from rodenticide contact
Choose humane, effective snap traps over poison every time.
This comprehensive approach addresses root causes through structural solutions, delivering permanent results rather than endless recurring treatments. Most structures require only addressing one or two main access points plus some preventive weak spot reinforcement — a manageable project delivering lasting peace of mind.
Frequently Asked Questions
NewGen Pest Control Team
Pest control specialists serving Greater Vancouver since 2016. 6× Consumer Choice Award winners.